
After using one of the disks on sale here, your Mac will boot your new macOS. You may wonder what you need to do next. These OpenCore post-install steps will keep your Mac running smoothly.
Open the OpenCore app and see the buttons (highlighted in red) below:

Build and install OpenCore
So, the first of the OpenCore post-install steps is to ‘Build and install OpenCore’. That will quickly build and then ask to ‘Install to disk’.

Tap/click ‘Install to disk’.
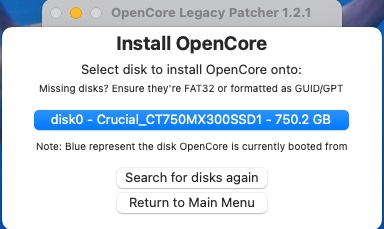
Then choose the internal disk your Mac boots from. Below is what mine says, but you are best placed to decide which disk is your internal drive – it will most likely be disk0.
Tap/click the blue lozenge, if that appears to be correct.
Then OpenCore looks for the EFI partition on disk0:
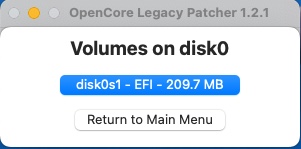
Again, tap the blue lozenge (in my case, to decipher the blue lozenge, disk0 sector1 is the EFI partition and is 207 MB in size), yours will be different.
Once you have chosen, it will ask for your password, and then will install the necessary boot-loader to the boot sector, and ask to reboot.
Post-Install Root Patch
You do not have to reboot – yet – you can choose ‘ignore’ and return to the main menu. Then you can do the second of the OpenCore post-install steps. Do the Post-Install Root Patch. This installs the required drivers to make everything work right once Sonoma or Ventura is running. Once you have worked through that, being affirmative at every prompt, you can at last reboot. When you reboot, hold down the option (or alt) key on your keyboard, and choose the EFI partition:

And then your hard disk.
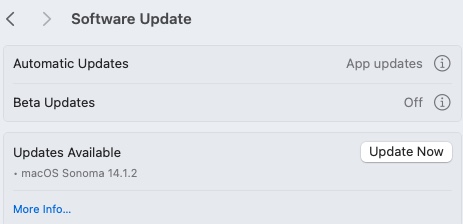
Hopefully then all will be well! Afterwards you can just shutdown and restart your Mac and use it as usual going forward. However, OpenCore will run in the background and prompt if there is a new OpenCore version. Always update and do as it asks! Also, make sure you turn off system auto-updates in System Settings (see those I greyed-out, below):

This is because new macOS incremental updates may be incompatible until you have prepared the way by updating OpenCore first.
Update the OpenCore app (download it from the OpenCore releases page if necessary). Then go through the OpenCore post-install steps, above. Build and install the latest boot loader, and run the latest root patch. Only after doing that, and rebooting, should you manually update your system to the next increment, (as I write Sonoma 14.1.2).
Once you have updated, OpenCore will prompt you to root patch again.
By the way, if you run into trouble installing OpenCore, or after installing, there is a good troubleshooting section on the OpenCore website.